Repairing Garage Door Cables Safely
- COMMERCIAL GARAGE DOOR REPAIR
- GARAGE DOOR OPENER INSTALLATION
- GARAGE DOOR SPRING REPAIR
- SAME-DAY GARAGE DOOR REPAIR
- CUSTOM GARAGE DOOR
- GARAGE DOOR OPENER REPAIR
- GARAGE DOOR TRACK REPAIR
- GARAGE DOOR CABLE REPAIR
- GARAGE DOOR PANEL REPAIR
- LOCAL GARAGE DOOR REPAIR
- GARAGE DOOR REPLACEMENT
- NOISY GARAGE DOOR FIX
- GATE REPAIR
- GARAGE DOOR INSTALLATION
- GARAGE DOOR SECTION REPLACEMENT
- OVERHEAD GARAGE DOOR REPAIR
How to Repair Garage Door Cables Safely
Garage door cables are critical components that ensure the smooth opening and closing of your garage door. However, when these cables snap or malfunction, they can become a hazard if not addressed promptly and properly. While it can be tempting to take on repairs yourself, working with garage door cables requires caution, knowledge, and the right tools. This guide will walk you through how to safely repair garage door cables and recognize when it’s time to call a professional.
Safety First
Before handling any repairs, prioritizing safety is essential. Garage door cables are under high tension, and improper handling could cause serious injuries.
1. Disconnect the Garage Door Opener
To prevent accidental activation during the repair process, always disconnect the garage door opener first. Unplug the opener or switch off its power supply. This simple step eliminates any risk of the door suddenly moving.
2. Secure the Garage Door
To avoid the garage door crashing down, secure it in place. Use locking pliers or C-clamps to hold the garage door in a partially open position. This prevents it from falling during the repair process, providing an added layer of safety.
3. Essential Safety Equipment
Make sure you have the right gear before starting. Wear gloves to protect your hands from sharp edges and safety glasses to shield your eyes from flying debris. A sturdy ladder is also necessary to reach the cables comfortably.
Step-by-Step Guide to Repair Garage Door Cables
1. Assess the Damage
Before removing anything, inspect the garage door cables thoroughly to determine the extent of the damage. Watch for fraying, rust, or a complete break in the cable. Identifying the problem helps you understand whether a full replacement is necessary.
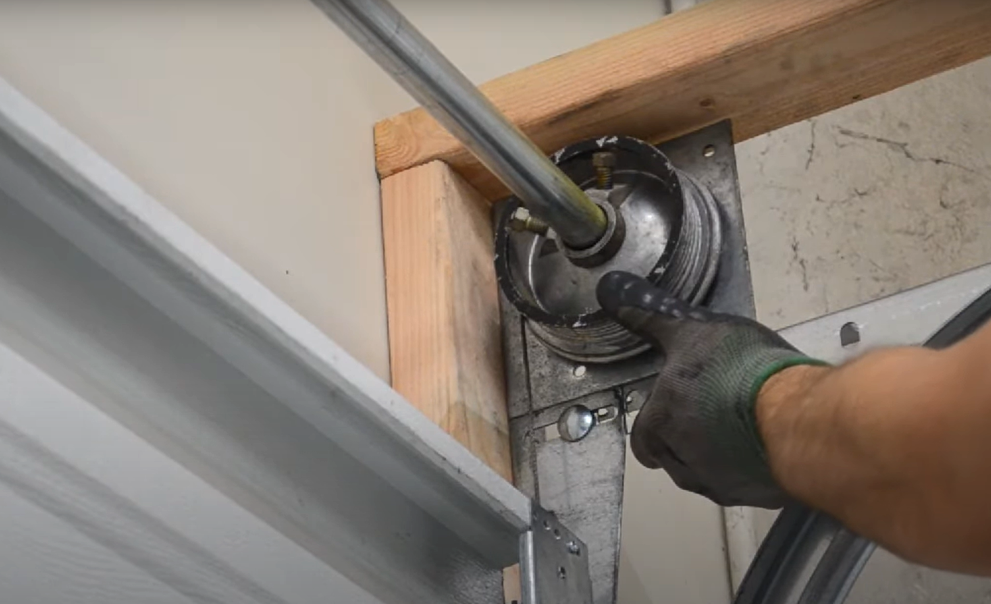
2. Remove the Broken Cable
Once the garage door is secured, use pliers or a wrench to carefully detach the broken cable from the garage door drum and bottom bracket. Take note of how the old cable was positioned—this will help when installing the new one.
3. Install the New Cable
Attach the new garage door cable to the bottom bracket and guide it along the pulleys and the cable drum. Ensure the cable is properly aligned and that there’s even tension. Finally, test your work by manually lifting and lowering the door to check if the cable moves smoothly.
When to Call a Professional
Not all repairs should be done yourself. Situations involving severe damage or misaligned garage door systems require the expertise of a professional.
Benefits of Hiring a Professional
- Expertise: Professionals have the knowledge and tools to handle complex repairs safely.
- Time-Saving: A professional can quickly diagnose and fix issues, saving you time and frustration.
- Long-Term Reliability: Professionals ensure that your garage door works efficiently and safely in the long run.
If you encounter difficulties during the repair or feel unsure about your abilities, it’s better to leave the job to experts like AL Garage Door Repair.
Regular Maintenance Is Key
To avoid future issues, keep your garage door in good condition by performing regular maintenance. Lubricate moving parts, inspect the cables, and test the door’s balance periodically.
Whether you’re fixing garage door cables or need a full replacement, AL Garage Door Repair is here to help. For expert assistance you can trust, contact our team today.